Quasimorph Midgame Combat Guide
Turn-based firefights when beginner moons stop teaching you enough
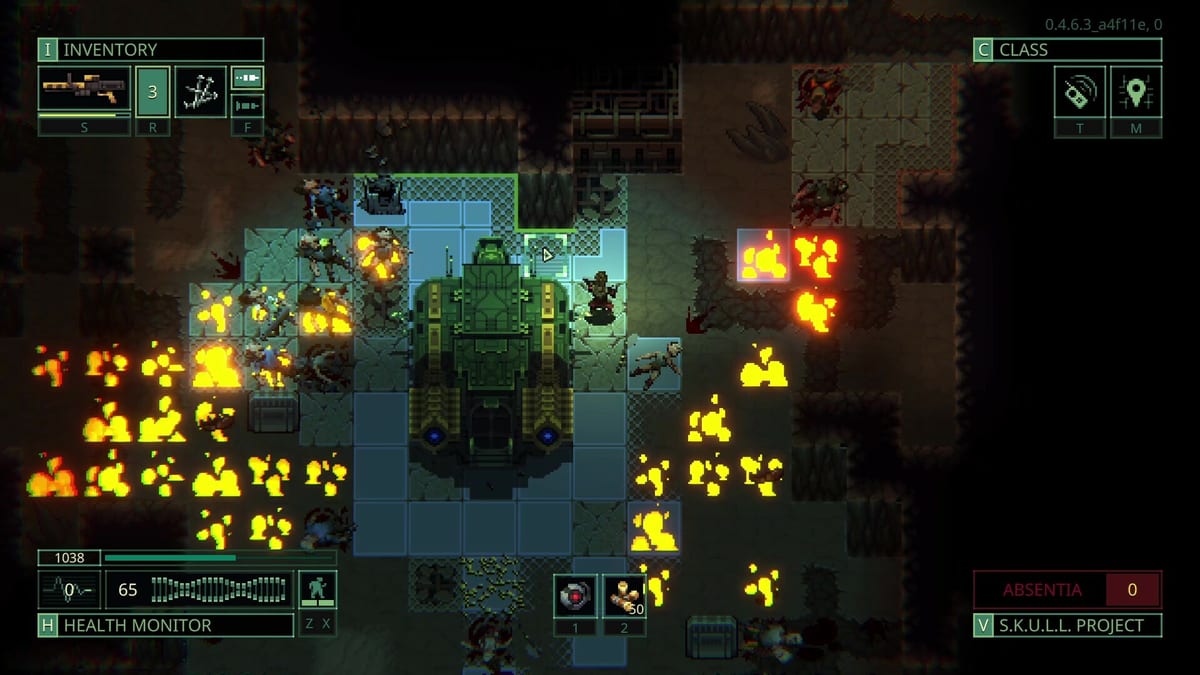
Midgame combat in Quasimorph is where extraction RPG fundamentals meet faction tech scaling. Magnum Scriptum’s July 31, 2026 version 1.0 release added twenty-nine new guns, refined operator damage bonuses, and sharper resistance curves on stations outside the Mars moon triangle. You can Sneak-clear Mars indefinitely and still fail the moment a pierce rifle meets a cut-immune robot squad on a Tezctlan contract. This guide covers the combat habits that carry clones through mid and late missions without donating loot to preventable deaths.
PMC enemies dodge about 2–5% more after Patch 1.0.2, and squads stay packed because patrols match the slowest member. Pair this page with the Enemy AI Guide so Investigating delays do not look like free peeks.
Examine resistances every contact
Right-click enemies to open the examine panel. Resistance percentages, armor pieces, wounds, and equipped weapons tell you whether your current ammo type is wasting turns. Midgame factions field mixed squads: riflemen beside shotgunners, flamethrower units guarding cyborgs, and robots that laugh at pierce. A single examine costs less than half a magazine fired blind.
Pair examination with Armor and Resistances knowledge. Robots commonly resist pierce, blunt, and fire while weak to cut. Human elites stack plate that shrinks rifle damage until you swap to blunt hammers or explosives. Examine is not a one-time check at first sighting — refresh when reinforcements arrive or when Quasimorphosis shifts patrol composition on horror stations covered in Quasimorphosis in Quasimorph.
Two damage types minimum
Single-type loadouts die in midgame. Plan at least two damage categories before deployment using the Loadout Planner. Primary rifle plus cut sidearm, shotgun plus pierce pistol, or melee backup for energy-immune targets all work. Version 1.0’s expanded Weapons pool makes swaps easier if you loot enemy guns mid-mission, but ship stash favorites should already cover your weak matchups.
Classes Builds amplify typing. Eclipse Blades want examination-backed melee bursts; Tifton’s Elite sustained fire needs a sidearm when LMG ammo type fails. Operators traits do not bypass resistances — Victoria Boudicca’s range helps apply the right gun safely, but you still must carry the right gun.
Doorway kiting
Door tiles are choke points. Open in Sneak, examine inward, then fight from the threshold so only one enemy engages at a time. Step back through the door to break line of sight when pain thresholds spike or when a second squadman would flank you. Doorway kiting converts three-on-one ambushes into three sequential one-on-ones where your initiative advantage from Combat Stances Sneak entry matters.
Never Sprint through a doorway into an uncleared room. Sprint blocks inventory and door interaction — exactly the tools kiting requires when a grenade or medkit would save the turn.
Sprint peek-shoot
Sprint peek-shoot is an advanced technique for confirmed contact at range: Sprint to a known cover tile adjacent to a door line, fire on the same turn if AP budget allows, then break stance before the next enemy acts. It trades accuracy penalty for positional surprise on targets you already examined. Use it sparingly on verified empty flanks, not as default room entry.
The technique pairs with Walk stabilization when you need one precise shot after movement. See Keyboard Controls for stance hotkeys so you are not menu-hunting under fire.
Gas, covers, and thrown weapons in 1.0
Version 1.0 separates thrown weapons from grenades and adds gas grenades, deployable covers, and composite damage types. Treat throwables like melee: they gain melee bonuses and can break. Deploy covers before contested peeks when crate geometry fails you. Gas is an AP economy tool — clear or vacate rooms before you loot through a cloud. Full item notes live in Weapons.
Weight, dodge, and calorie pressure
Heavy backpacks and armor panels reduce dodge chance. Midgame loot greed kills clones as often as bullets — overweight kits cannot dodge critical hits and burn calories faster, which matters for Tunnel Rats routes and long horror clears. Weigh kits in the Loadout Planner against expected loot volume. Extract with partial bags beats dying with a full inventory you cannot move away from a Baron approach documented in How to Beat Baron in Quasimorph.
Crafting and Consumables food and calorie items help, but prevention beats recovery. Strip junk armor for rags on ship instead of hauling dead weight through eccolapse sectors.
When NOT to Sneak-explore
Sneak is default, but not universal. Stop Sneak-exploring when:
- Timer missions demand objective completion before Quasimorphosis or patrol waves overwhelm you. Walk verified corridors and skip optional rooms.
- Defense, Control, and Security contracts lock the horror meter at zero per Mission Types in Quasimorph — you can Walk cleared lanes aggressively without eccolapse risk.
- Extract alarm triggers at high Quasimorphosis. Every Sneak tile feeds time; Walk or Sprint verified extract paths instead of clearing new sectors.
- Known empty sectors you cleared two turns ago. Re-Sneak only after map shifts or when horror events invalidate prior intel from Quasimorphosis Survival Guide.
Sneak-explore every tile on a timed storyline step from Campaign Overview is how quest items die in optional loot rooms.
Hard mission skulls myth
Community rumor claims skull-marked hard missions spawn different enemy types. In practice, hard missions increase pressure, rewards, and Quasimorphosis climb rate — not a separate bestiary. Enemy tables still come from faction and station tech documented in Quasimorph Factions Guide. Prepare mixed damage and doorway kiting, not imaginary elite-only counters.
Hard skulls do mean less room for mistakes. Budget medkits from Crafting and Consumables and keep extract AP reserved earlier than on normal contracts.
Throwing weapons and operator damage in 1.0
Version 1.0 expanded throwing weapons and tied operator stat bonuses to thrown damage more visibly. Grenades, knives, and consumable explosives bypass some armor profiles rifles struggle with. Carry at least one throwable for clustered targets behind cover when doorway kiting cannot isolate them.
Operator damage modifiers stack with weapon base values — check your Operators panel before assuming a grenade hits as hard as a community screenshot from a different clone. Test throw ranges on Mars before committing rare throwables on a Baron-adjacent run.
Deployable covers, gas grenades, and separated throwables
Combat 1.0 adds two deployable covers and four gas grenades alongside composite damage typing. Covers buy turns at door thresholds — deploy before you peek, not after you are already flanked. Gas clouds interact with fire and liquid on station tiles; a fuel puddle under a choke point can turn one grenade into a multi-tile hazard that blocks your own extract path.
Thrown weapons are now separated from grenades: knives, saws, nails, and bottles gain melee bonuses, can break on use, and should be budgeted like disposable sidearms rather than unlimited explosives. Hold Shift to throw as documented in Weapons. Employee ID from story progression opens locked doors without burning grenades — check ID before Sabotage objectives.
Pair gas-and-cover play with doorway kiting above. When gas alone will not finish armored targets, swap to composite or cut backup after examine refreshes.
Midgame loadout checklist
- Two damage types confirmed via Loadout Planner.
- Examine reflex bound in Controls.
- Door peek never on last AP.
- Weight under dodge comfort threshold.
- Throwables for cover clusters.
- Extract AP reserved before optional clears.
Related guides
- Room Clearing Tactics — door doctrine this guide extends.
- How to Beat Baron in Quasimorph — when combat meets Rapture.
- Quasimorphosis Survival Guide — horror tempo changes.
- Guides Hub — full reading order.
- Enemy AI Guide — Investigating and packed patrols after 1.0.2.
- Items Hub — weapons, armor, and augmentations.
- Classes Hub — builds that match your typing.
Frequently Asked Questions
Quick answers to the most common questions.
How many damage types should midgame Quasimorph loadouts carry?
At least two. Faction tech scaling and mixed squads make single-type kits fail once you leave Mars, Phobos, and Deimos. Plan primary and sidearm coverage in the Loadout Planner before launch.
What is doorway kiting in Quasimorph?
Fight from door thresholds so enemies engage one at a time. Open in Sneak, examine inward, shoot from the choke point, and step back to break line of sight when multiple hostiles would flank you.
Do hard mission skulls spawn different enemies?
No. Skull-marked hard missions increase pressure and rewards, not a separate enemy roster. Faction and station tech still determine who spawns.
When should I stop Sneak-exploring in Quasimorph?
Stop when timers pressure you, when extract alarms trigger at high Quasimorphosis, or when sectors are verified empty. Timed story objectives favor Walk through cleared lanes over full Sneak clears.
Do throwing weapons matter in Quasimorph 1.0?
Yes. Version 1.0 expanded throwables and operator damage bonuses. Knives and bottles are separated from grenades with melee bonuses and break-on-use rules — see Weapons guide.
How do deployable covers and gas grenades work in 1.0?
Two deployable covers buy turns at choke points. Four gas grenades interact with fire and liquid tiles. Examine floor hazards before throwing so clouds do not block your extract path.
How does weight affect midgame combat?
Heavy loot and armor reduce dodge chance and burn calories faster. Overweight clones die to critical hits they would otherwise avoid. Weigh kits before horror missions.